Homemade Frozen Dog Treats
Funny Bone to Bark About
You know, it all started on a rainy Tuesday. I was standing in my kitchen, surrounded by five hyperactive dogs who seemed to operate on their own personal power grid. I wordlessly questioned my sanity when they turned their sad puppy dog eyes towards me, begging for a treat. I mean, the guilt was real. I had just read every article and watched every video about the horrors of store-bought dog food, and suddenly my commitment to serving my furry companions healthy, homemade meals seemed more essential than ever. Honestly, how could I sit there and serve them those sad, lifeless kibble pellets while my cooking game had been evolving?
So, armed with a couple of cookbooks, lots of trial and error, and an ever-growing stash of ingredients to create the most delectable dog snacks, I decided it was time to whip up a batch of homemade treats for them. Let me tell you, the first time I pulled those treats out of the freezer, I felt like a proud parent at a toddler’s first school play. All eyes were fixated on those treats, and the moment I offered them to my dogs, I became the most popular human on the block. The tail wags had me feeling like an award-winning chef.
Now, I can’t say they were all perfect that first time (thank you, my dear puppy Izzy, for thinking they were chew toys instead), but I did get it right eventually. Homemade Frozen Dog Treats quickly became my hallmark kitchen triumph. And now, I want to share this wonderfully delightful experience and recipe with you. Ready to make your pups bark with joy? Let’s dive into this delightful culinary adventure!
Why These Treats Are Paw-sitively Amazing
- It’s ridiculously easy to make – You don’t need to be a kitchen wizard to pull this off! If I can do it after a chaotic day with my dogs demanding their dinner, anyone can! Seriously, it’s like putting together a jigsaw puzzle with the edges already done.
- It’s impressively delicious – Don’t be shocked if your friends think you hired a personal chef. When they taste these homemade dog treats, they might just start drooling, too – and I don’t mean drooling like dogs do.
- It’s comforting – This recipe is the kind of dog food that makes you feel everything is going to be okay. There’s nothing quite like watching your pups joyfully munching away while you sit back with a cup of tea, basking in the warm and fuzzy feelings of being a great pet parent.
- It saves a ton of money – Why spend all your cash on fancy dog food that your pup might not even enjoy? With these treats, it’s like preparing a gourmet meal without breaking the bank. You’ll feel like you just hit the jackpot!
- Quality control – You get to know exactly what goes into these treats. No hidden ingredients, no weird preservatives. Just good old-fashioned love mixed with wholesome ingredients. Your pups deserve the best, and you can deliver it without a second thought.
Preparation & Cooking Time
- Total Time: 3 hours
- Preparation Time: 20 minutes
- Cooking Time: 2 hours
- Chilling Time: 40 minutes
- Servings: Makes about 24 treats
- Calories per serving: Approximately 45 calories per treat
- Key Nutrients:
- Protein: 1.5g
- Carbs: 6g
- Fat: 2g
Ingredients You Need
Get ready for a fun shopping adventure! These are the ingredients you’ll need:
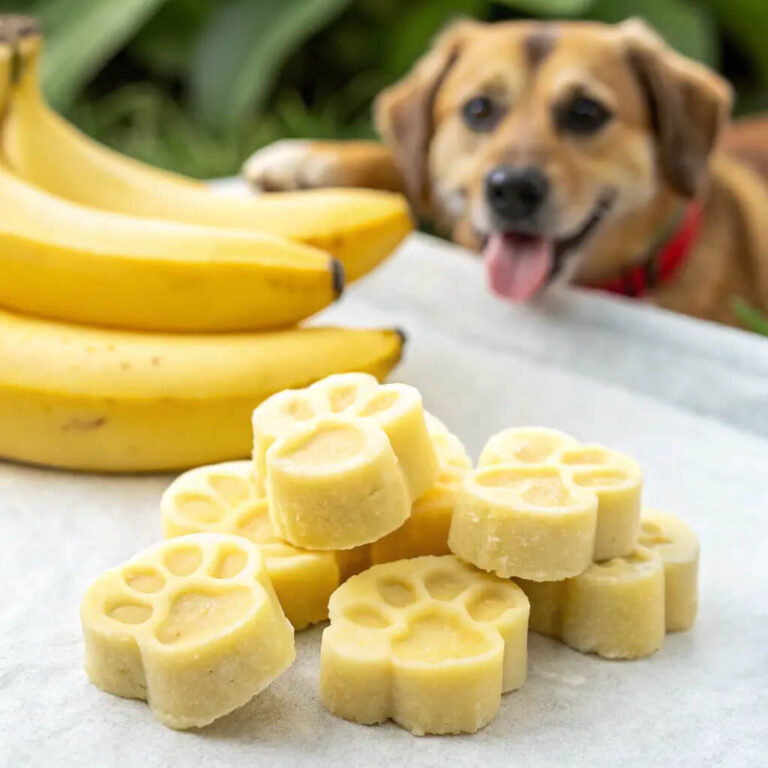
- 2 ripe bananas – Go for the ones with a few brown spots; they’re sweeter and mushier!
- 1 cup of peanut butter – Make sure it’s xylitol-free; we want happy dogs, not sad faces!
- 1 cup of low-sodium chicken broth – Because what’s better than the smell of chicken to get tails wagging?
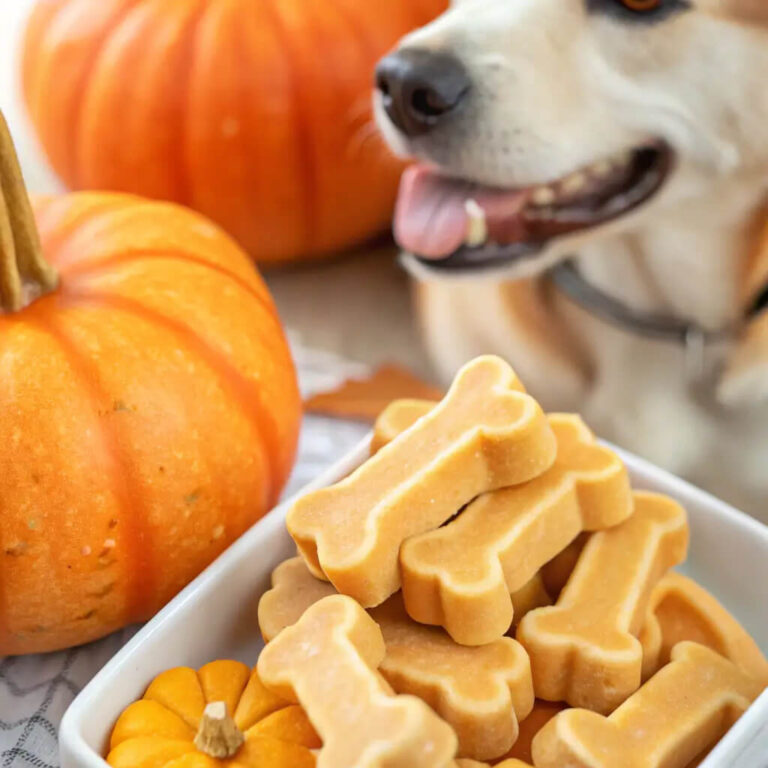
- 2 cups of whole wheat flour – The backbone of our treats. Look at it as the “skeleton” that holds all the goodness!
- 1/4 cup of oats – Consider these the little flavor sprinkles that bring everything together.
Ingredient Highlights & Variations
Let’s talk about some ingredient highlights and fun variations!
- Bananas: Packed with potassium, fiber, and vitamins, bananas are not just tasty; they’re great for your dog’s digestive health. Plus, let’s be real—every time I peel one, I can hear my pup’s little paws scampering over for a taste!
- Peanut Butter: The ultimate doggy treat! Just watch out for those additives. Opt for natural peanut butter, because nothing says “I love you” like a heaping scoop of the good stuff. Bonus points if you get the crunchy kind for some added texture!
- Chicken Broth: This liquid gold is a game-changer. It makes everything better, and I can’t forget how my dogs nearly trip me just to get a sniff. If you’re feeling wild, you can also use vegetable broth for a vegetarian twist!
- Whole Wheat Flour: The base of our treats adds a touch of heartiness without feeling like a rock. For those feeling adventurous, you can swap in oat flour or almond flour if your pooch is gluten-sensitive.
- Oats: They’re rich in fiber and a great addition to keep your dog feeling full. Plus, they give a lovely crunchy texture in the treat. If you’re feeling creative, try adding pumpkin or sweet potato puree for a seasonal twist!
Step-by-Step Instructions
Ready to get cooking? Here’s how we transform those ingredients into tail-wagging treats:
- Step 1: Preheat your oven to 350°F (175°C). This is crucial, and trust me, the treats will love you for it.
- Step 2: In a mixing bowl, mash your bananas until they resemble a gooey mix. Channel your inner artist and make it satisfying!
- Step 3: Add the peanut butter and chicken broth. Mix until smooth; you might want to taste test the peanut butter for quality control. It’s a scientific approach, after all.
- Step 4: Gradually add the whole wheat flour and oats, mixing until a dough forms. You know you’ve hit the jackpot when you can mold it into a ball without it sticking all over your hands.
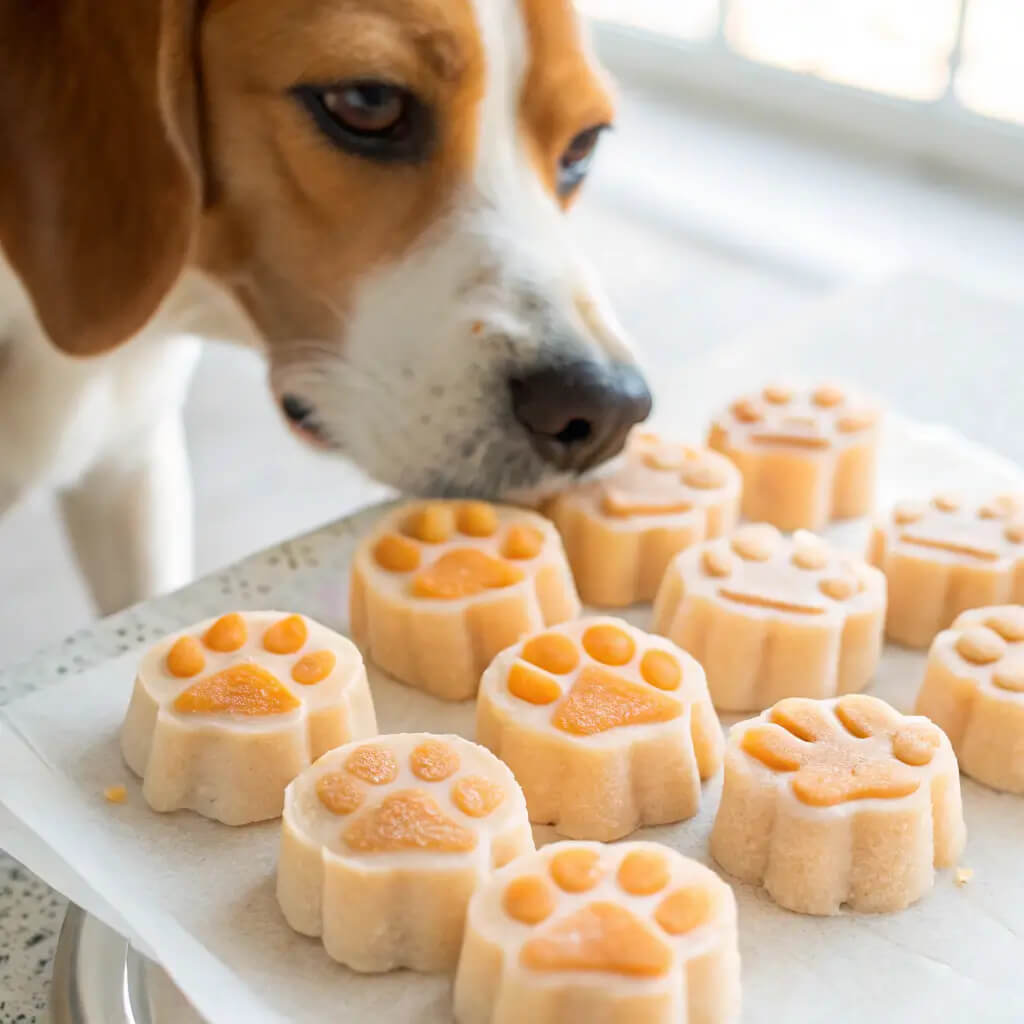
- Step 5: Roll out your dough on a floured surface until about 1/4 inch thick. Get crafty and use cookie cutters to shape them—or just use a knife to create fun squares!
- Step 6: Place the treats on a parchment-lined baking sheet. Make sure they’re spaced out, so the pups don’t get into a doggy wrestling match while baking.
- Step 7: Bake for 20–25 minutes or until golden brown and delightful – your kitchen will smell heavenly!
- Step 8: Let them cool completely before serving them to your furry friends. Remember, patience is a virtue and a vital part of your chef repertoire.
How to Serve It
Now that those treats are baked to perfection, let’s talk about how to serve them up in style:
- Serve it with a smile! You’ve earned it – and trust me, your dogs will pick up on your good vibes.
- Put them in an adorable treat jar or tin; presentation is everything, right? Because nothing says love like a sprinkle of doggy flair!
- Add a little pizzazz! Garnish with finely chopped carrots or parsley for an extra pop of vet-approved healthy goodness. Just be prepared for nose nudges!
- Pair it with a “puppuccino” – a delightful blend of yogurt and peanut butter in a little cup. Your dogs will feel like they’re visiting a doggy café!
- For that fancy restaurant vibe, have a small paw-ty with some doggie friends. Share the treats and enjoy your role as “Chef Extraordinaire” on social media!
Frequently Asked Questions
Have some burning questions? Here are a few answers with a twist of humor on the side:
- Can I use regular peanut butter instead of natural? Yep, but check the ingredients; you want to avoid anything with xylitol. It’s toxic to dogs. Think of it as the bad apple in the otherwise yummy fruit basket!
- What if my dog is allergic to chicken? Great question! You can substitute with vegetable broth or beef broth. Your pup will still think you’re a culinary genius!
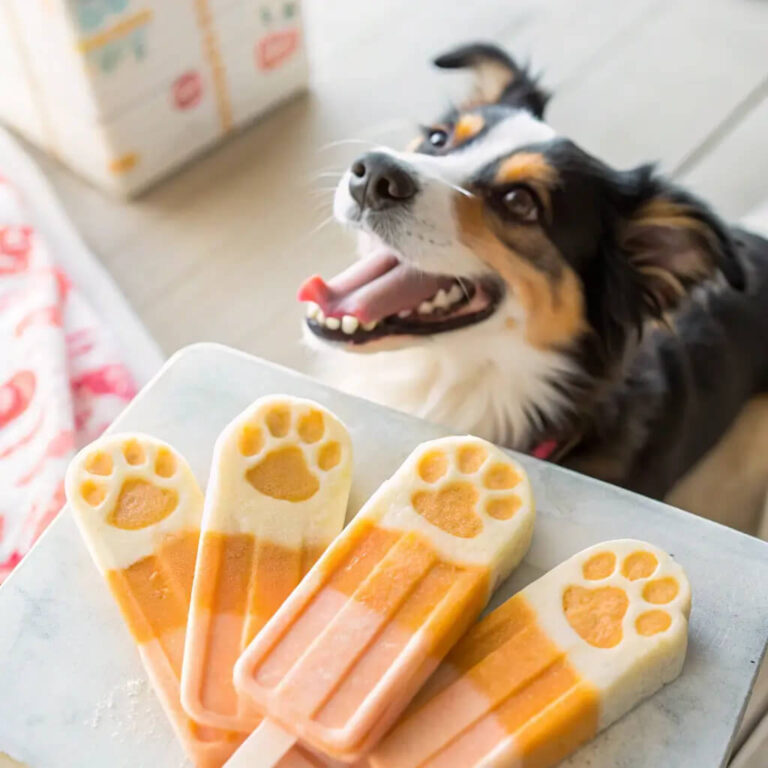
- Can I freeze these treats? Absolutely! These babies won’t mind a little chill, so feel free to stash them in a container for later. You’ll be the cool dog parent in town!
- What’s the shelf life of these treats? They can last about a week at room temperature. But honestly, if your dog chows down on them, they probably won’t even last that long!
- Can my dog have more than one treat at a time? Moderation is key! Remember, treats are extras; we still want to keep those puppy waistlines in check!
Wrapping Up the Tail-Wagging Fun
So, there you have it; my secret recipe to winning over your dog’s heart (and taste buds) with these homemade frozen dog treats. I can’t wait for you to try this out. It’s not just about making food for your dogs; it’s about creating wonderful moments together, sharing healthy goodies, and definitely laughing at their quirky reactions. I encourage you to get creative with it—tagging your pups in your adventures will be a delightful experience for all! Don’t forget to share your furry friends’ antics with me. I’m all ears (or paws!). Let’s make your kitchen our happy bonding space! Who knows; you may end up being my next guest chef!